How to import and export translations
Sometimes you want to work with translations outside the app — to hand them to a translator, edit them in a spreadsheet, or keep a backup. Lokalize's Import / Export page lets you export your translations as CSV and import them back in.
Export translations
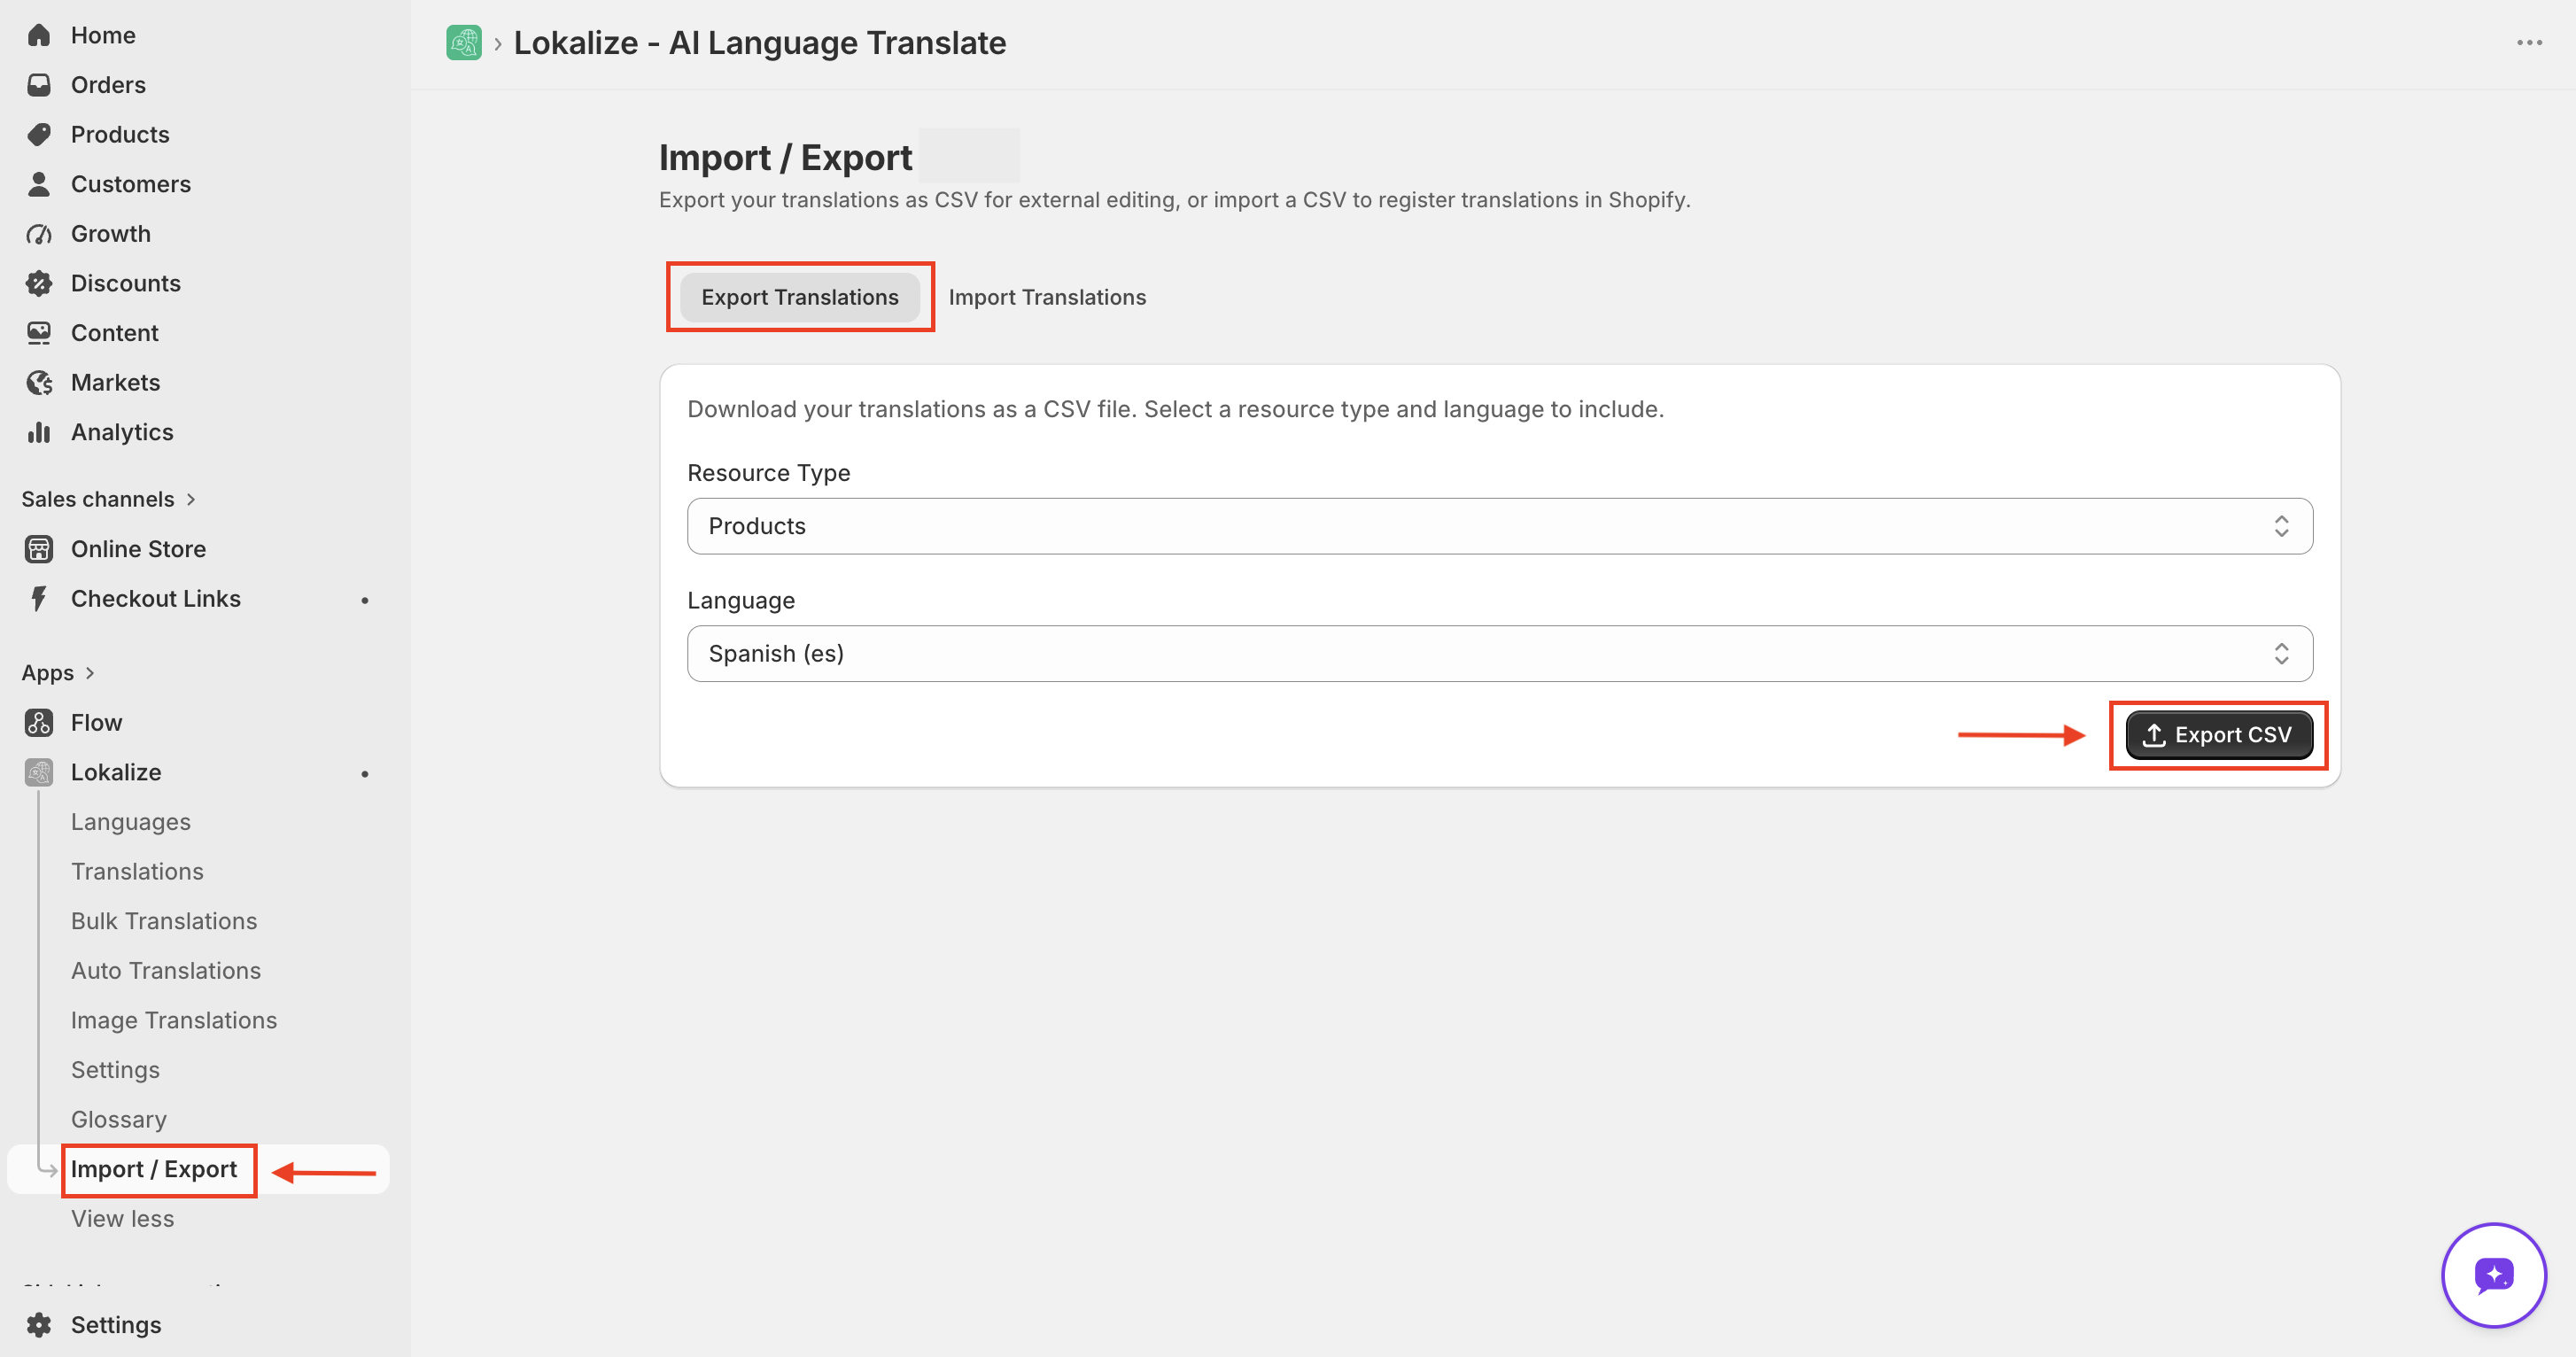
- Open Lokalize → Import / Export and select the Export Translations tab.
- Choose a resource type and a language.
- Click Export CSV.
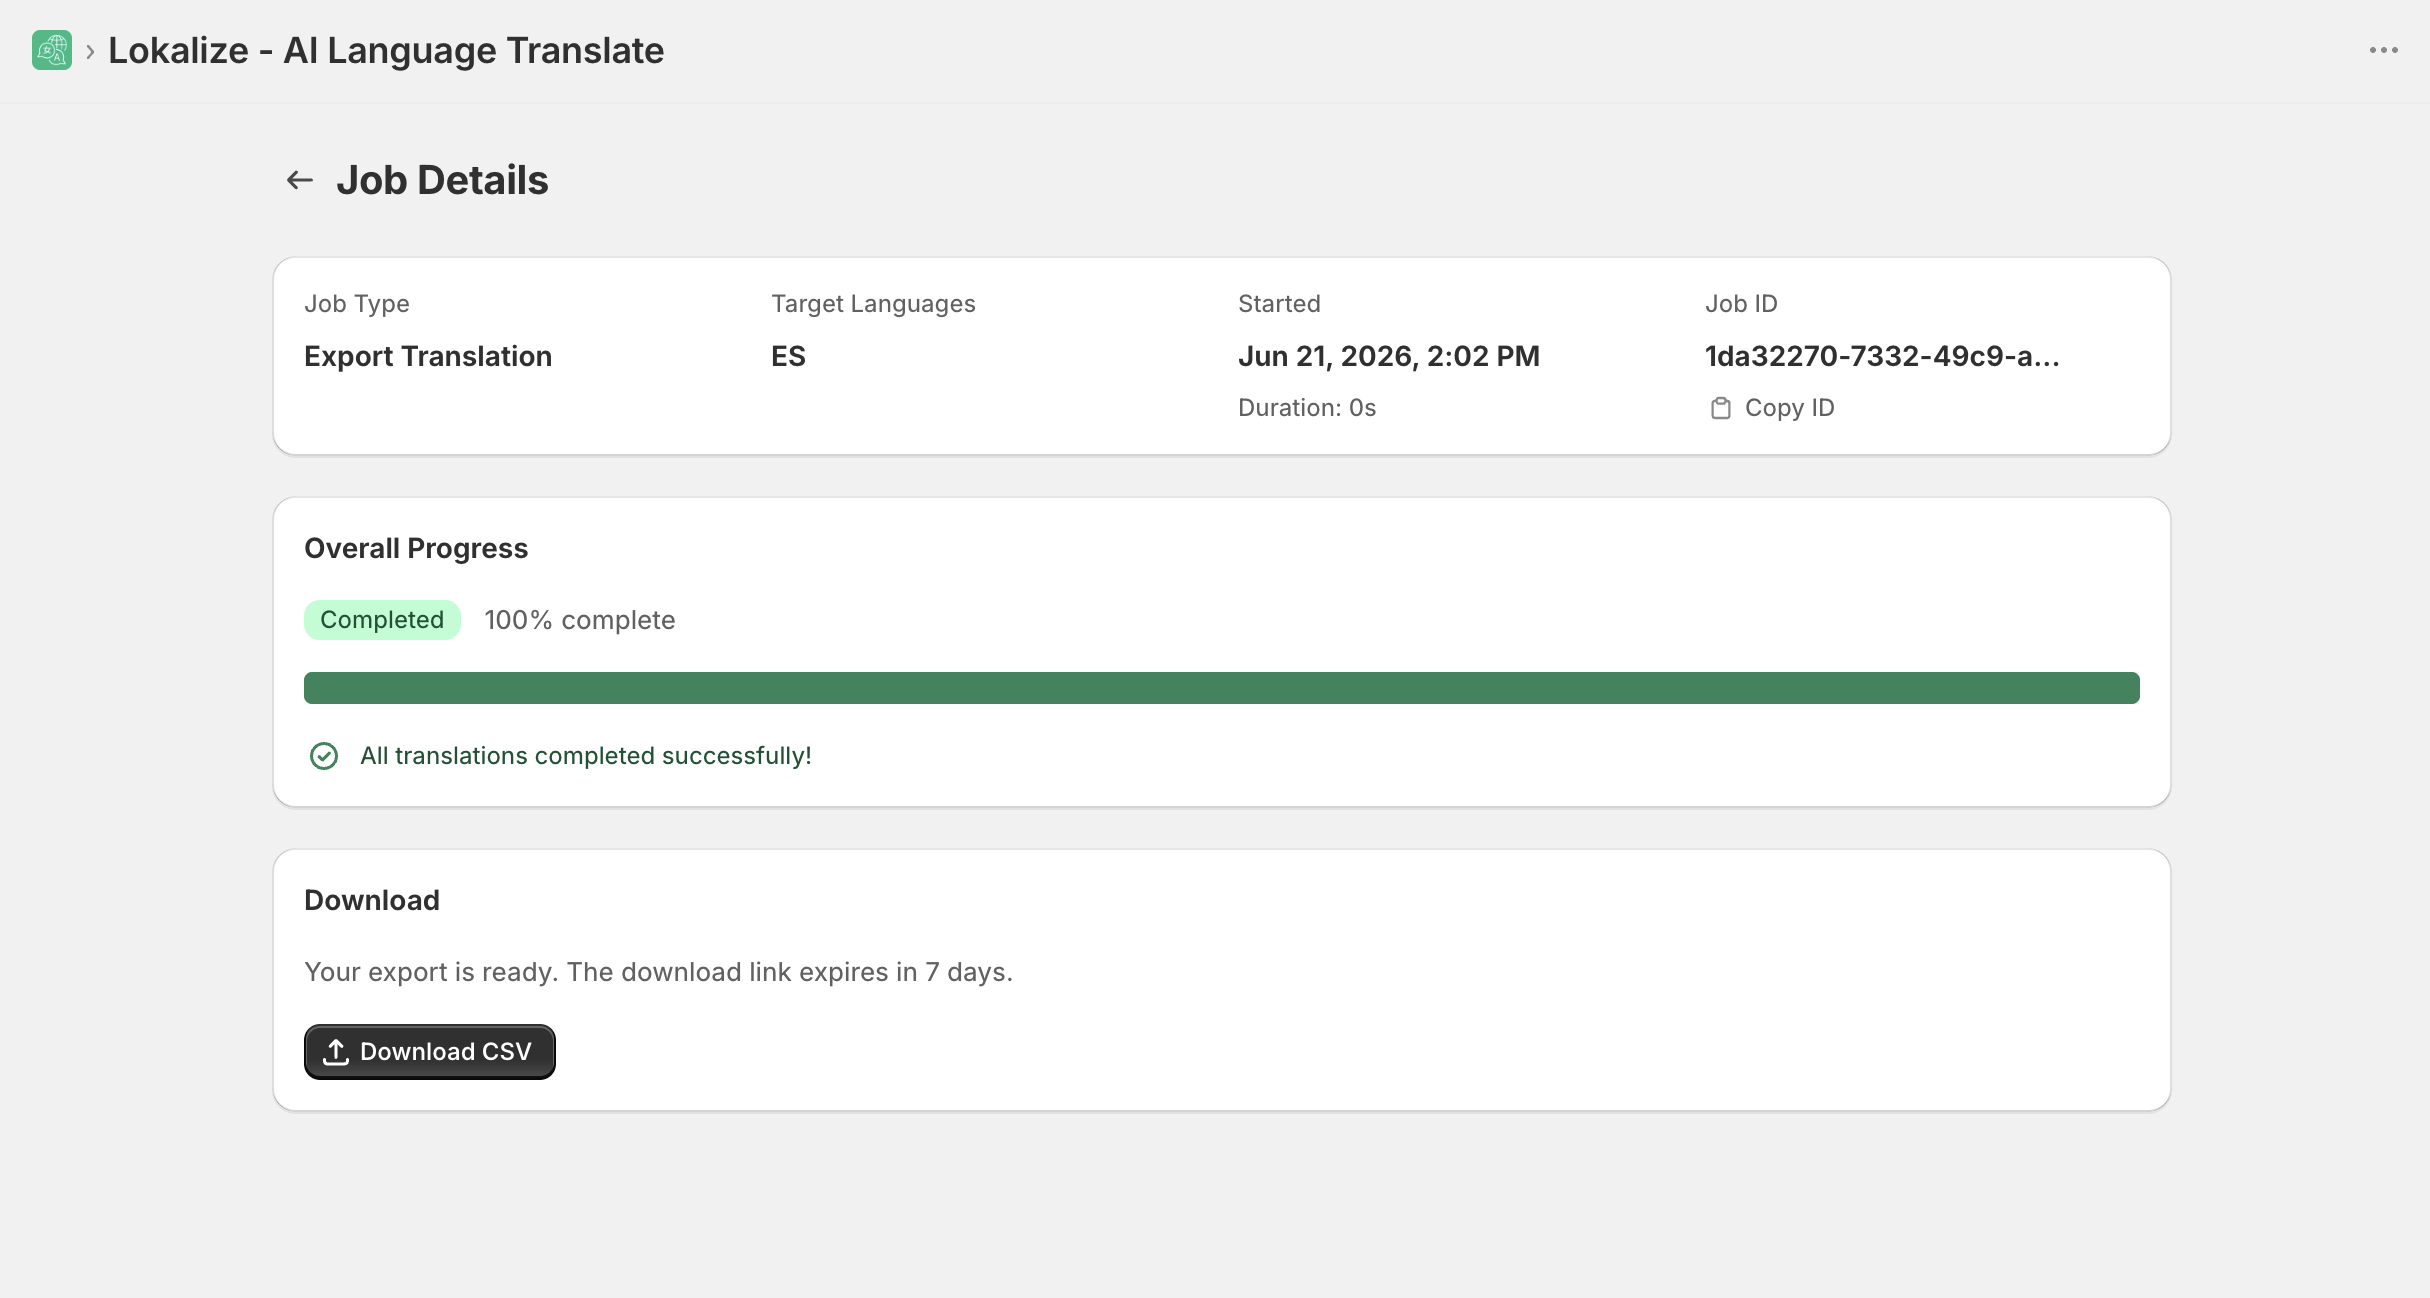
Lokalize builds the file as a background job and takes you to the Job Detail page. When it's ready, a Download CSV button appears.
- The download link expires in 7 days.
- The file is named
translations-YYYY-MM-DD.csv.
Import translations
- Open Lokalize → Import / Export and select the Import Translations tab.
- Click Download template CSV to get a correctly formatted sample file.
- Fill in your translations, then upload the file (
.csv, up to 10 MB).
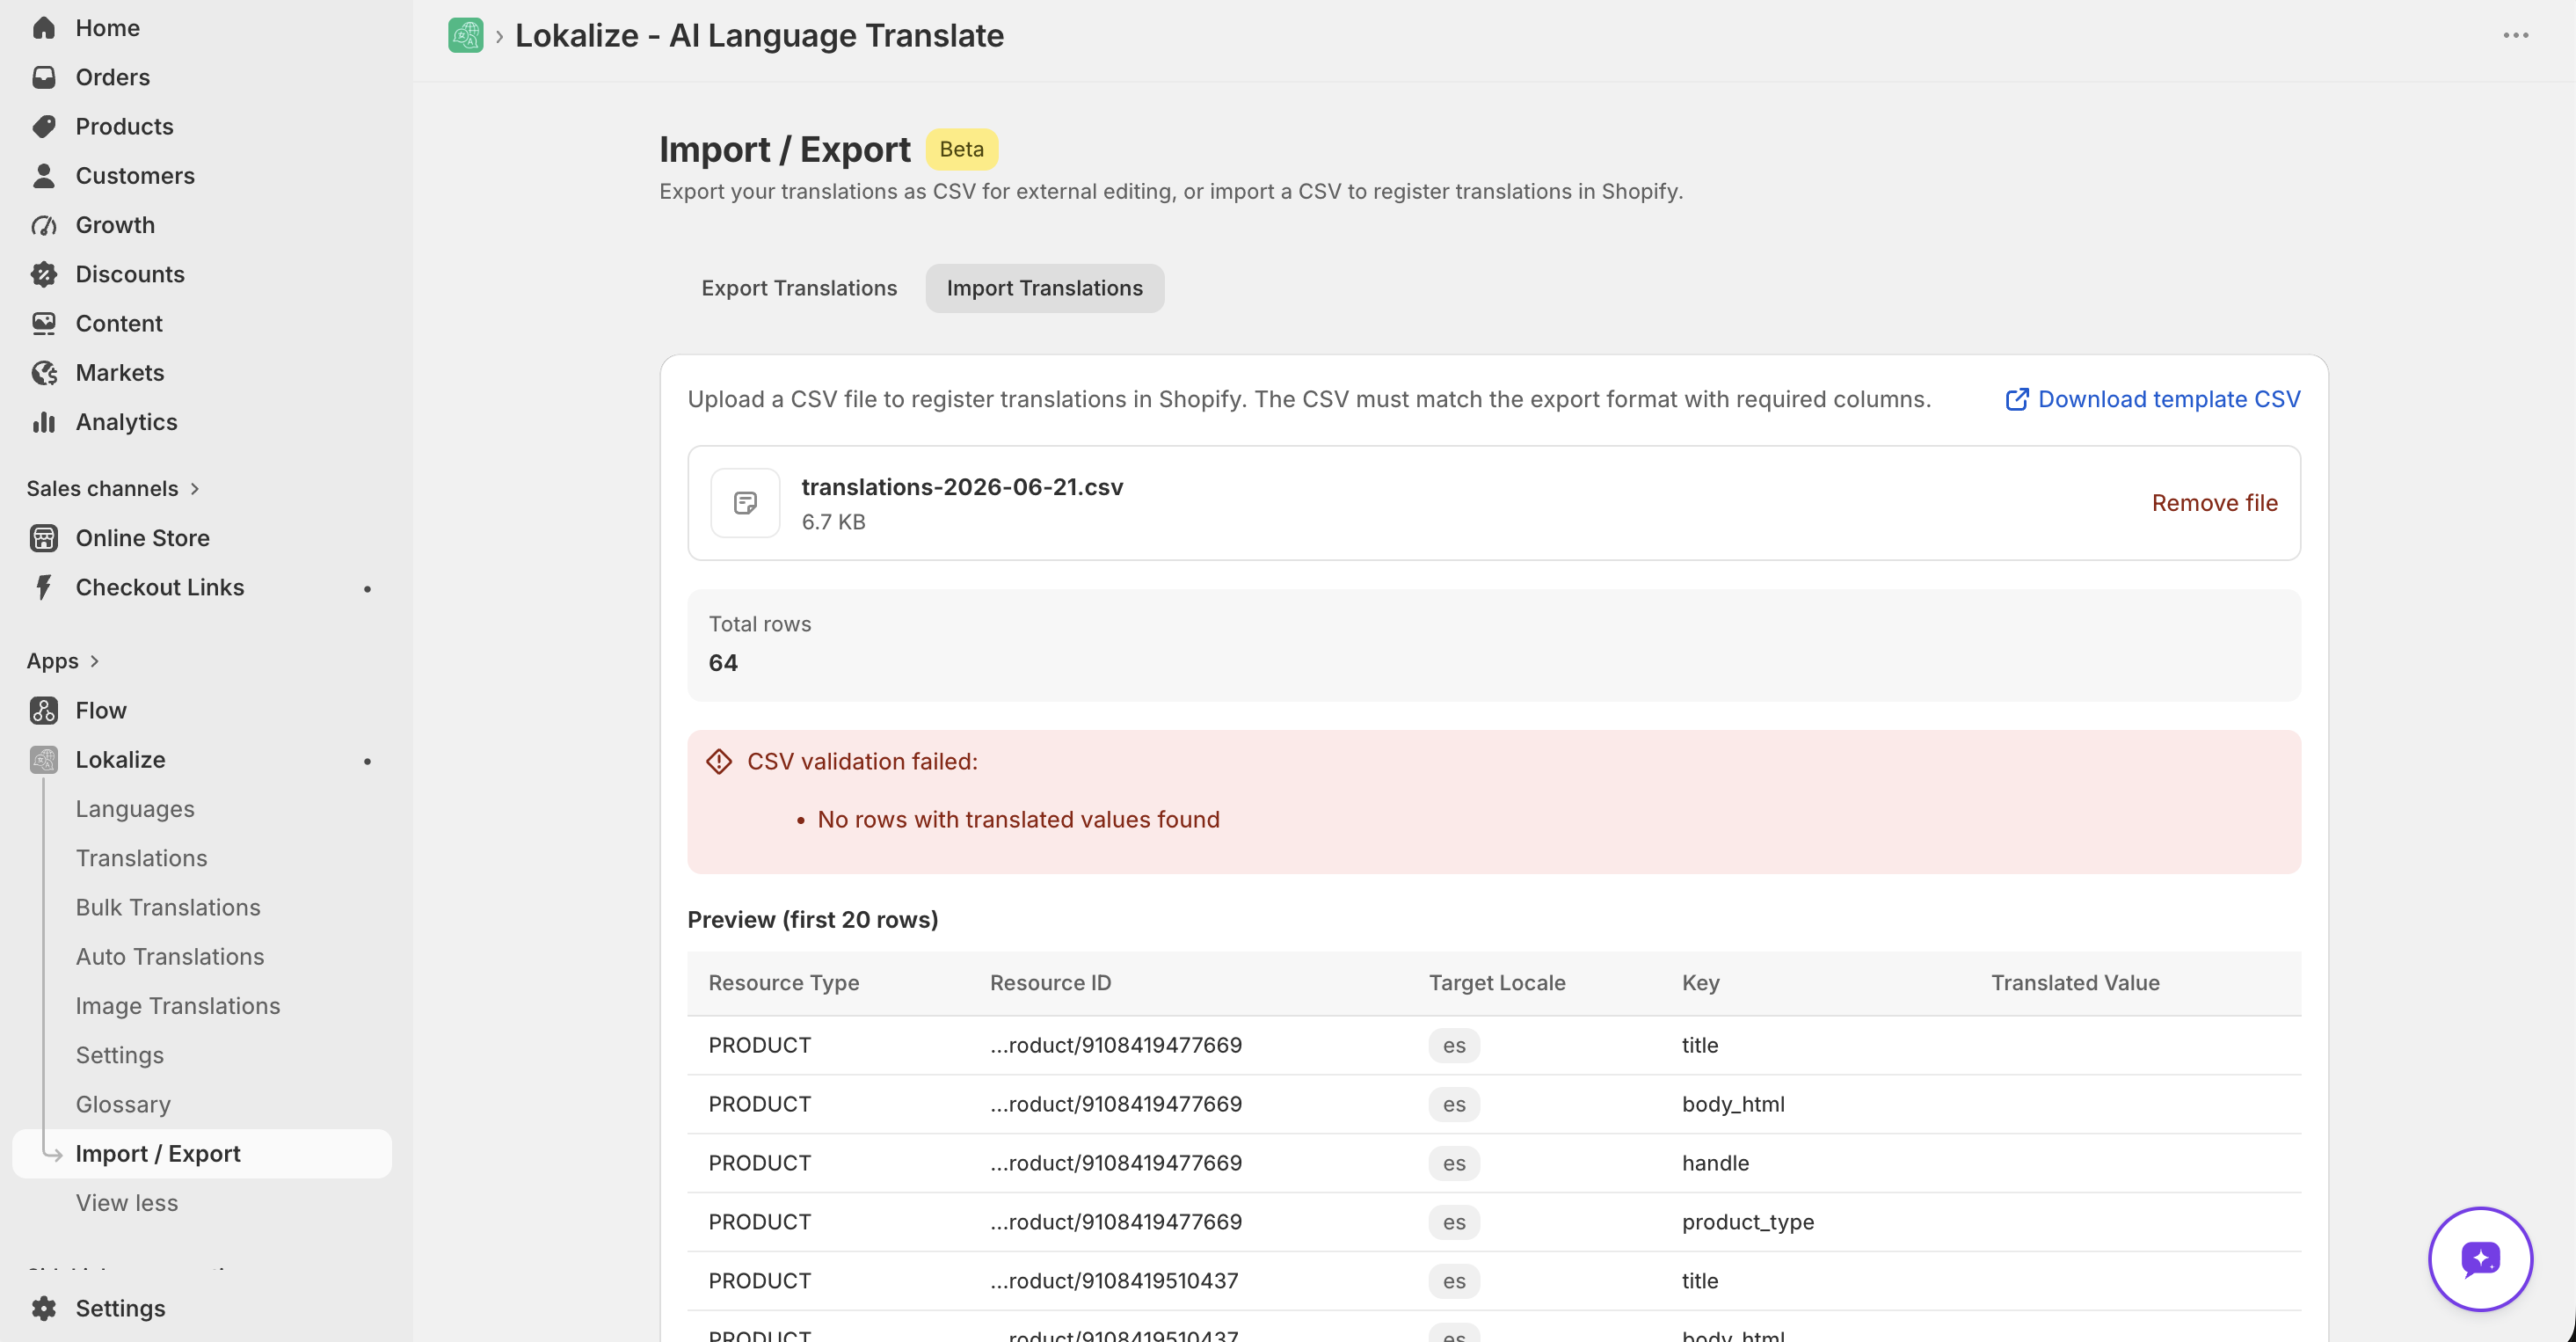
- Review the preview — it shows total rows, valid rows, skipped rows, and an estimated word count.
- Click Import to start the job. You'll be taken to the Job Detail page to track progress.
CSV format
Required columns (import)
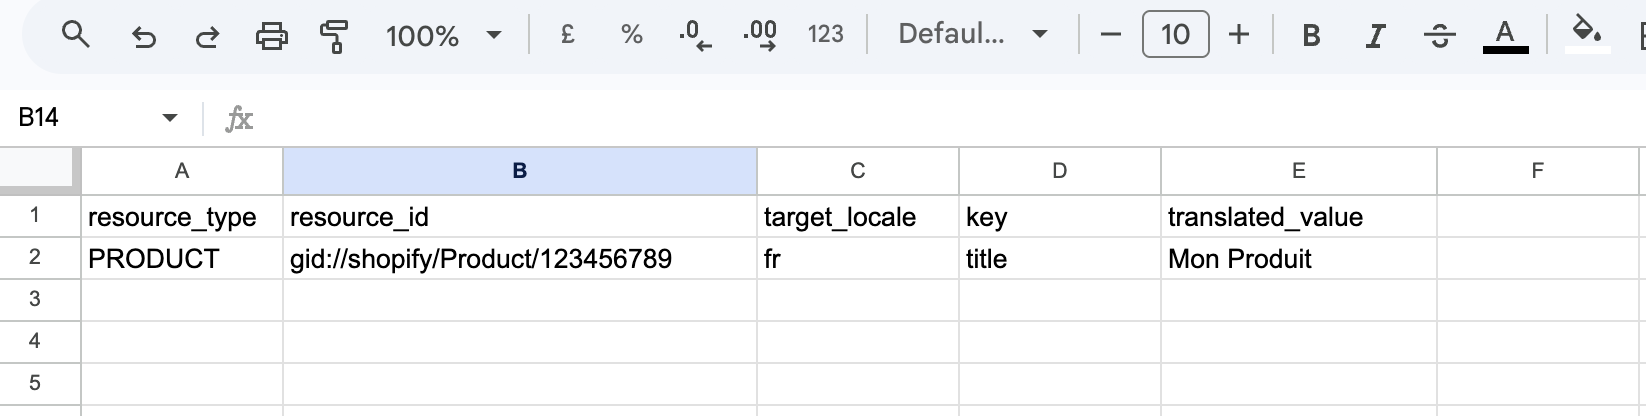
These five columns are required when importing:
| Column | Notes |
|---|---|
resource_type | e.g. PRODUCT |
resource_id | a Shopify GID, e.g. gid://shopify/Product/123456789 |
target_locale | must be a published or AI-enabled language on your store |
key | the field being translated, e.g. title |
translated_value | your translation |
The Download template CSV button generates a file with exactly these headers — use it as your starting point.
Additional columns in exported files
When you export translations, the CSV also includes source_value (the original text, for reference) and content_type (the field's content type). These columns are informational — they're ignored during import but useful when handing a file to a translator or diffing changes.
A few rules:
- Only rows with a non-empty
translated_valueare imported. Rows without a translation are skipped (and counted under "Skipped"). resource_idmust start withgid://.target_localemust match a language that exists on your store.- Save the file as CSV with UTF-8 encoding so non-Latin scripts aren't corrupted.
Import and export cover a wide range of resource types — products, collections, pages, blogs, articles, menus, metafields, metaobjects, shop, email templates, theme locale content, and more.
Frequently asked questions
Where are my translations stored?
Translations are stored in Shopify, not on Lokalize's servers. If you uninstall the app, your languages and translations remain in your store. Exporting is useful for backups or handing content to a translator — not for keeping your translations alive.
Will I lose translations if I unpublish a language?
No. Unpublishing hides the language from customers but keeps all its translations intact. You can continue to edit them in the app and re-publish at any time.
What is the difference between unpublishing and deleting a language?
Unpublishing hides the language from your storefront but preserves its translations. Deleting removes the language and permanently deletes its translations from Shopify. Export your translations before deleting if you might need them later.